Look Development
All look work happens in the viewer, with immediate feedback. Work through the categories in order. The comparisons on this page use the explosion sample. Numbers in the text match the markers on each panel screenshot.
00 - Grids
Tells the viewer which channel holds which grid. A volume imported through VDB Studio is mapped automatically, so you rarely change these. An SVT from Native Import needs mapping by hand.
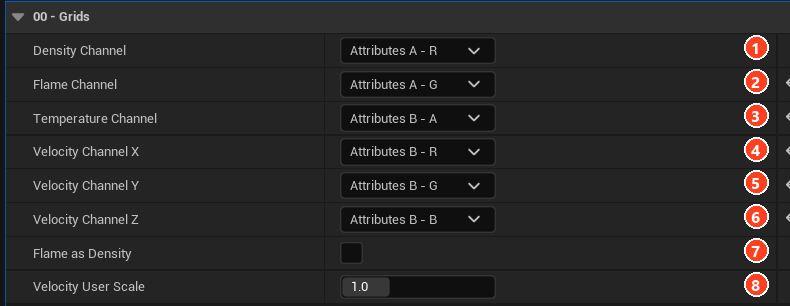
Density (1), Flame (2) and Temperature (3) point to the channels holding each grid. Velocity X, Y and Z (4 to 6) point to the velocity components. Velocity User Scale (8) multiplies the calibrated motion.
For a fire with no density grid, Flame as Density (7) uses the flames as the volume's density.
01 - Density
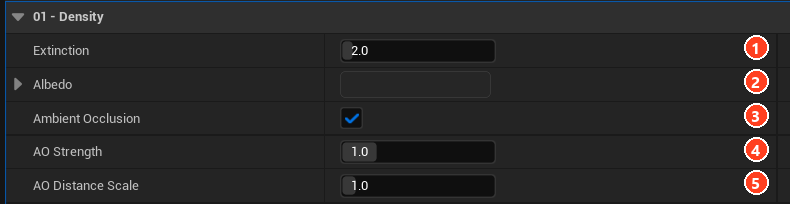
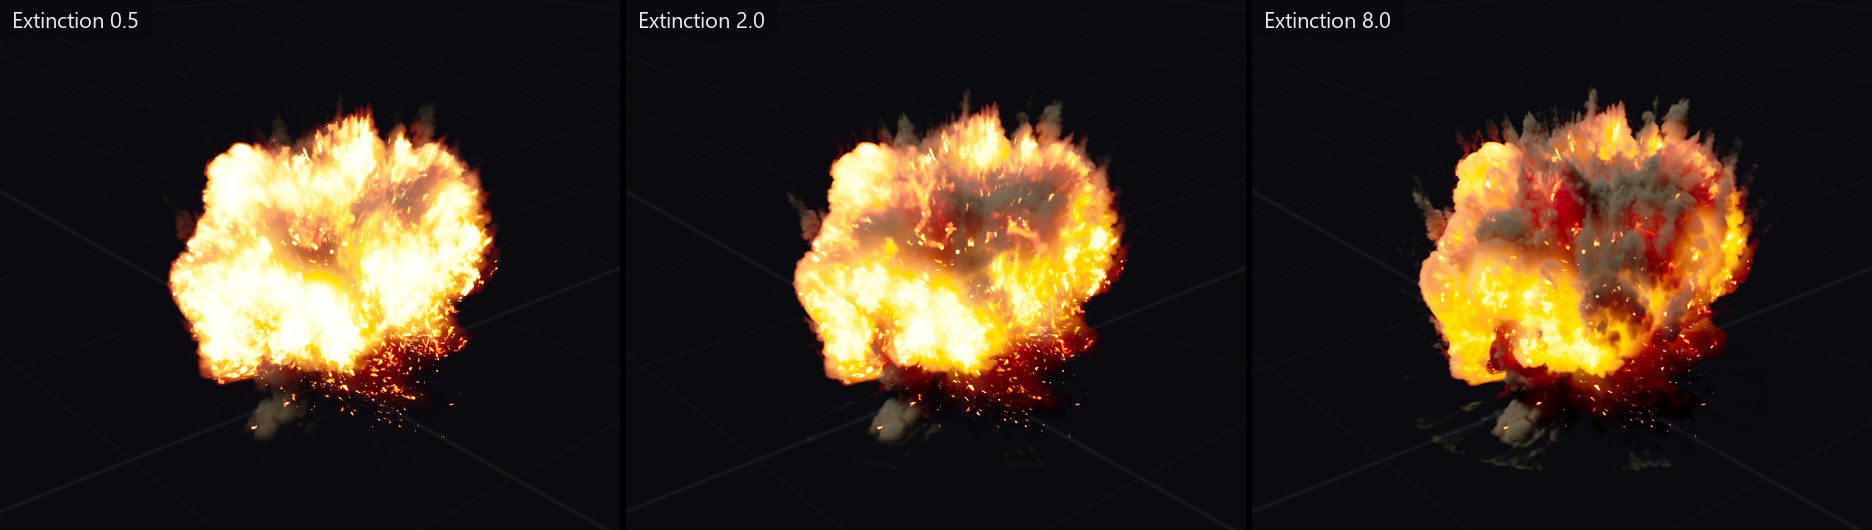
Extinction (1) sets how strongly the volume absorbs light: higher values give thicker, more opaque smoke.
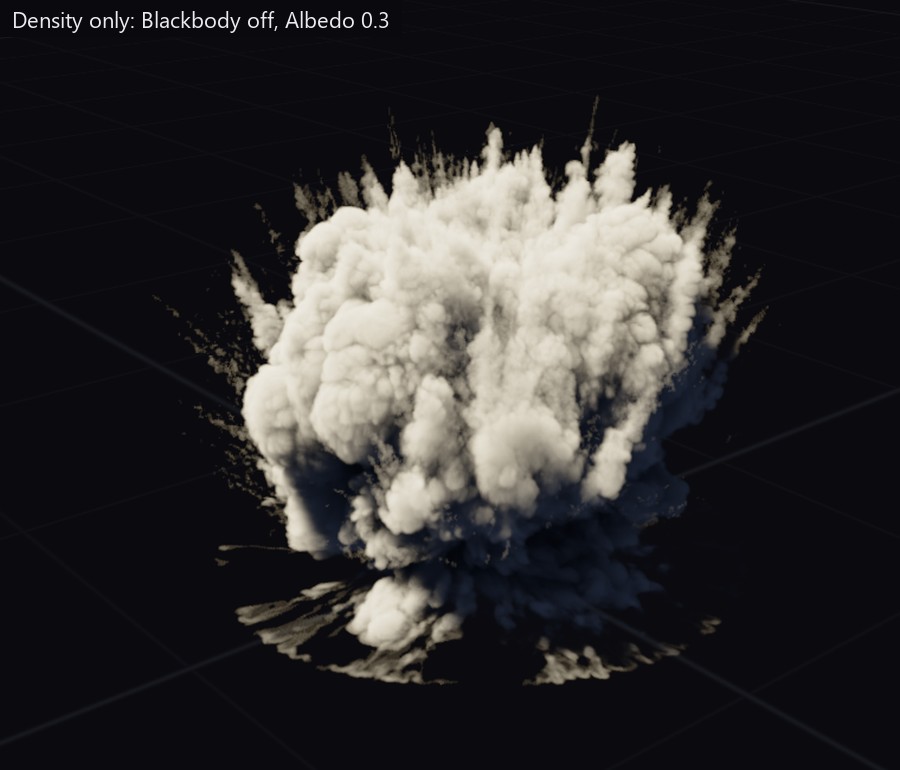
Albedo (2) is the scattering colour. Dark values read as soot, light values as cloud or steam.
Ambient Occlusion (3) darkens skylight inside dense smoke, which stops a thick plume reading as flat grey. It is nearly free.
02 - Emission
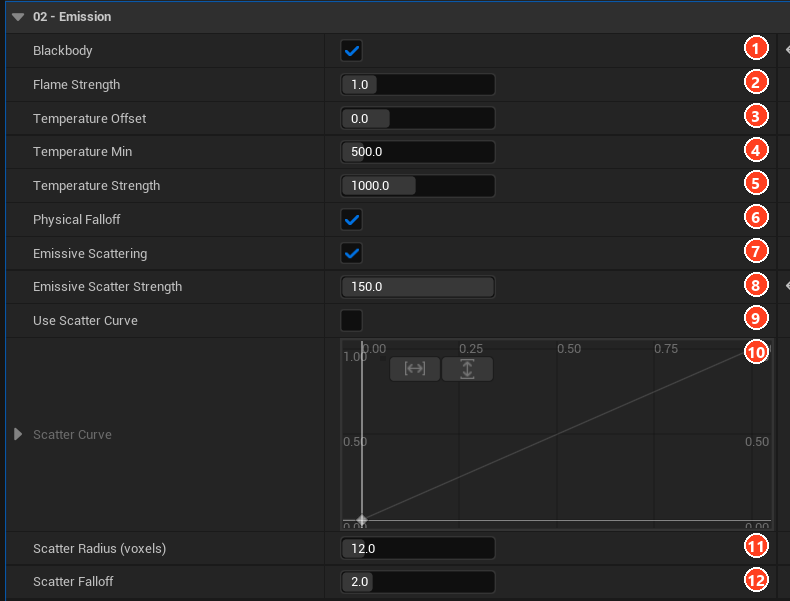
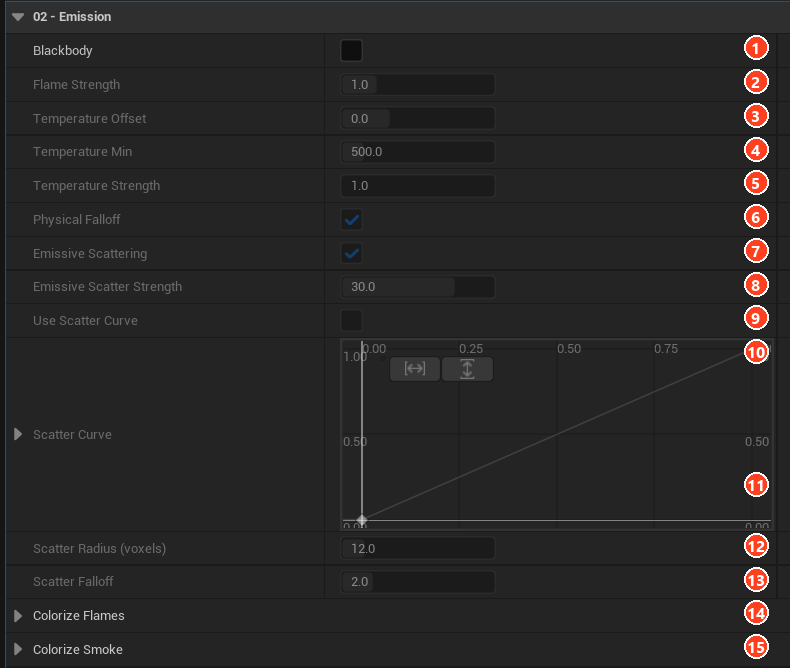
Blackbody (1) turns the flame and temperature grids into fire. Flames set how much burns, temperature sets the colour it glows.
| # | Setting | Effect |
|---|---|---|
| 2 | Flame Strength | Scales temperature before the colour lookup, shifting hue rather than brightness. |
| 3 | Temperature Offset | Adds Kelvin. Positive is hotter and whiter, negative cooler and redder. |
| 4 | Temperature Min | Kelvin below which nothing emits. Trims a dull red fringe. |
| 5 | Temperature Strength | Brightness. |
| 6 | Physical Falloff | Scales emission by T⁴, as a real radiator behaves. |
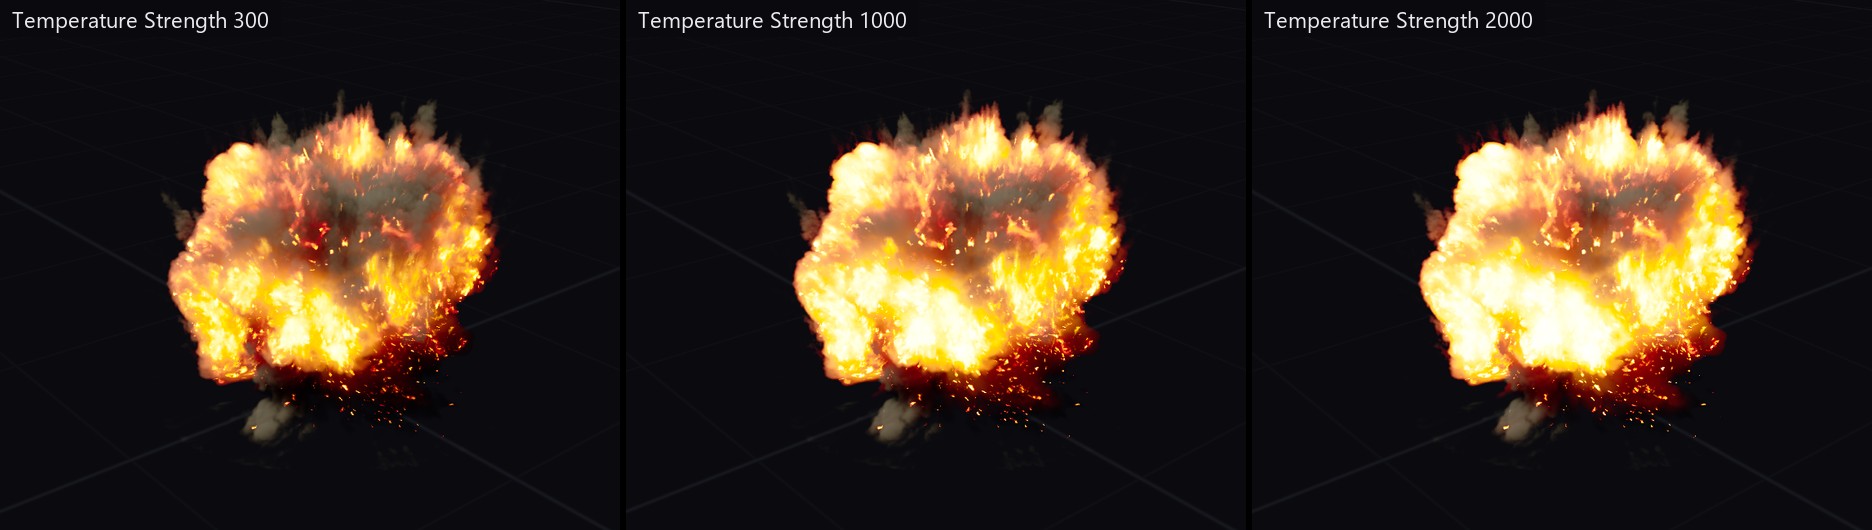
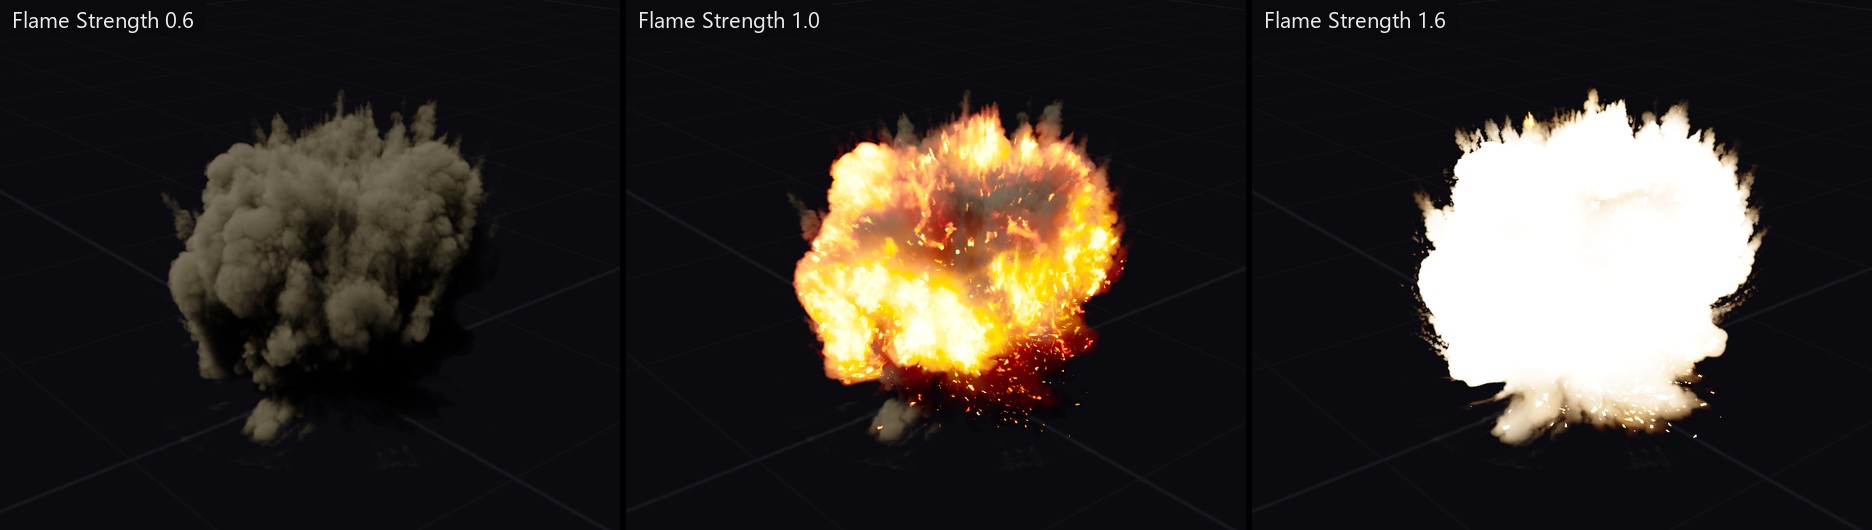
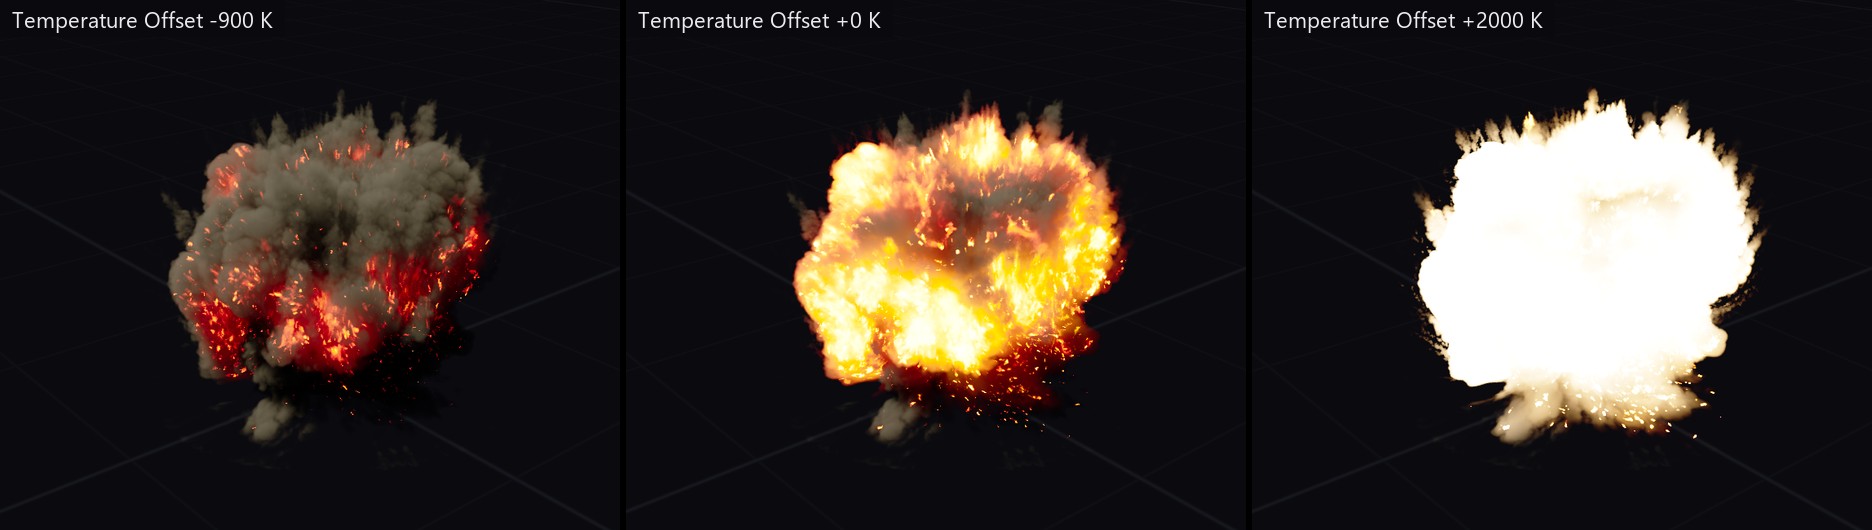
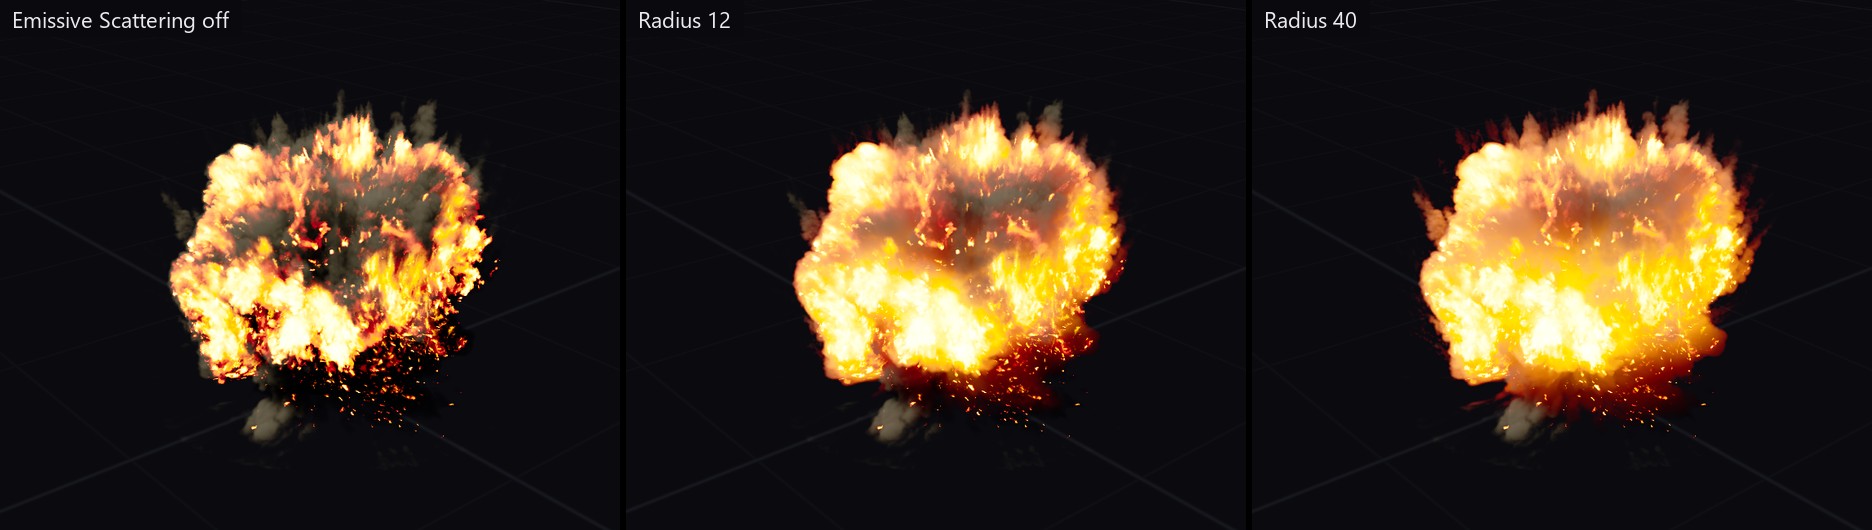
Emissive Scattering (7) lets the fire light its own smoke. Without it, fire looks like a bright decal. Emissive Scatter Strength (8) sets the amount, Scatter Radius (11) how far it travels, in voxels, and Scatter Falloff (12) how softly it fades. Use Scatter Curve (9) and Scatter Curve (10) reshape the spill.
To colour fire or smoke with a gradient instead of physics, turn Blackbody off. Colorize Flames and Colorize Smoke appear, each taking a Curve Linear Color asset or a gradient texture to convert.
03 - Remap
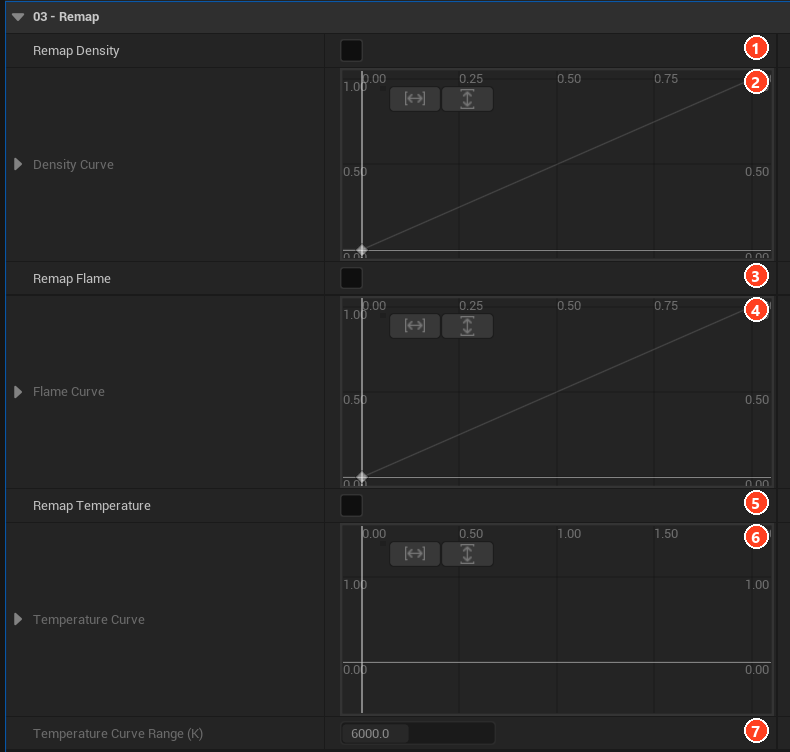
Curves that reshape stored values before shading: Remap Density (1, 2) to lift thin smoke or crush haze, Remap Flame (3, 4), and Remap Temperature (5, 6) in Kelvin. Temperature Curve Range (7) sets the curve's span. Raising the low end of the temperature curve makes cool fire edges less red.
04 - Micro Detail
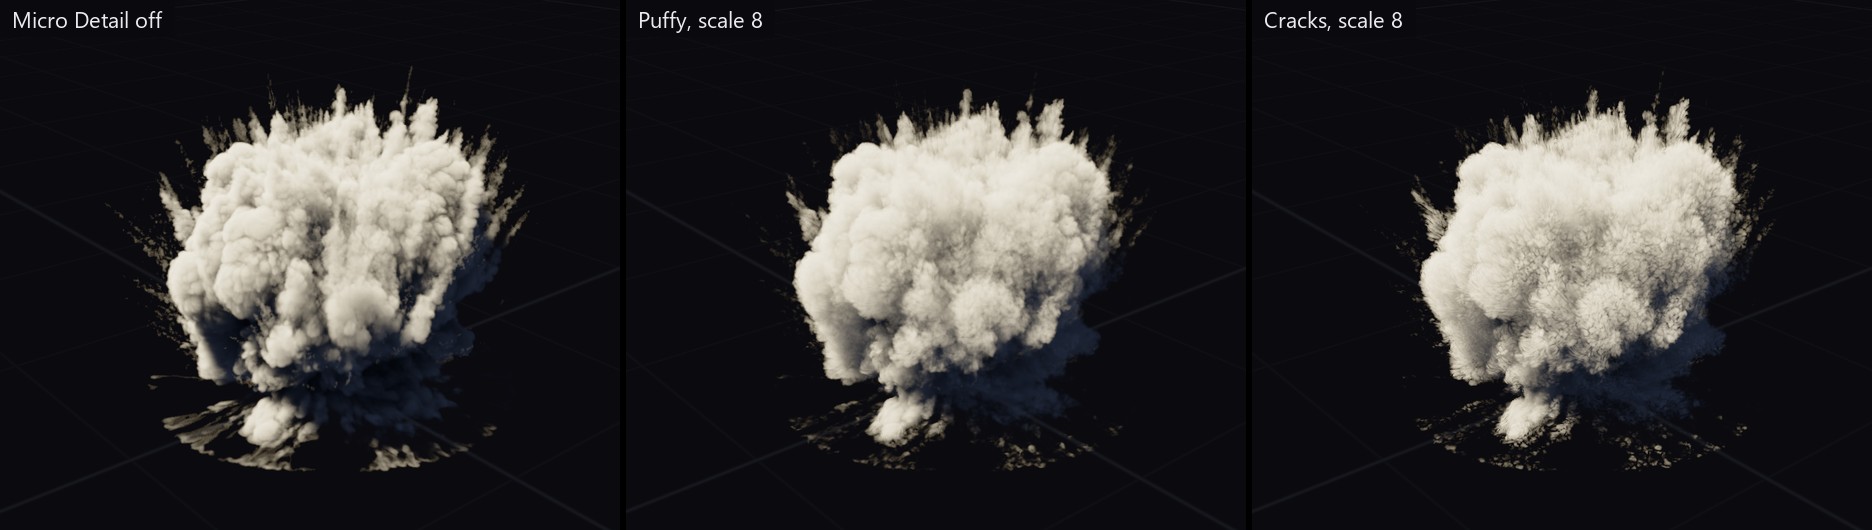
Tiling noise that erodes thin edges and warps the volume, adding detail finer than the voxels. It is the most expensive look feature, so use it for hero volumes.
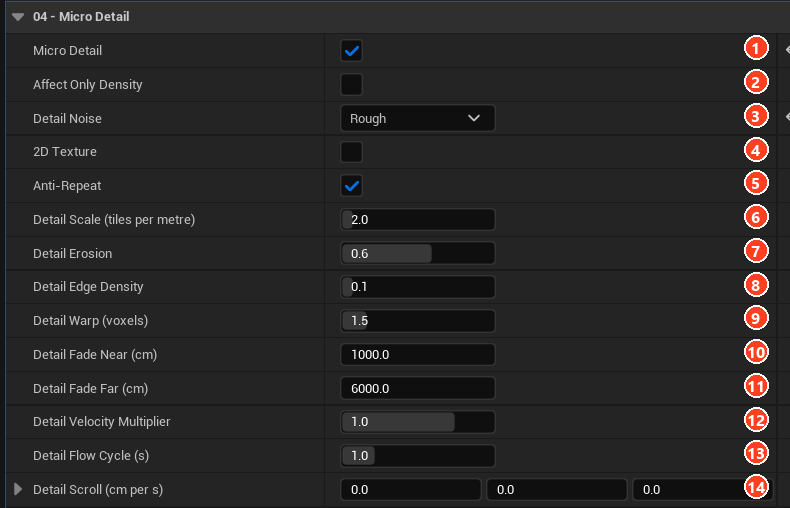
| # | Setting | Effect |
|---|---|---|
| 1 | Micro Detail | Turns the effect on. |
| 2 | Affect Only Density | Leaves flames untouched. |
| 3 | Detail Noise | Puffy, Rough, Cracks, Wispy or Grainy. |
| 4 | 2D Texture | Tri-planar noise: 6 reads per phase instead of 2. |
| 5 | Anti-Repeat | Hides tiling for one extra read per lookup. |
| 6 | Detail Scale | Tiles per metre. Higher is finer. |
| 7 | Detail Erosion | How much thin smoke is eaten away. |
| 8 | Detail Edge Density | Erosion acts below this density. Raise it to bite deeper. |
| 9 | Detail Warp | Displacement in voxels. |
| 10, 11 | Detail Fade Near / Far | Camera distance over which detail fades out. |
| 12 | Detail Velocity Multiplier | How much the noise follows the smoke. |
| 13 | Detail Flow Cycle | Length of one flow cycle. |
| 14 | Detail Scroll | Constant drift. |
Realtime turns on with Micro Detail so you can see it move. To stop the noise swimming, bake its motion with BAKE FLOW, see Lighting and Shadows.
Inspecting the data

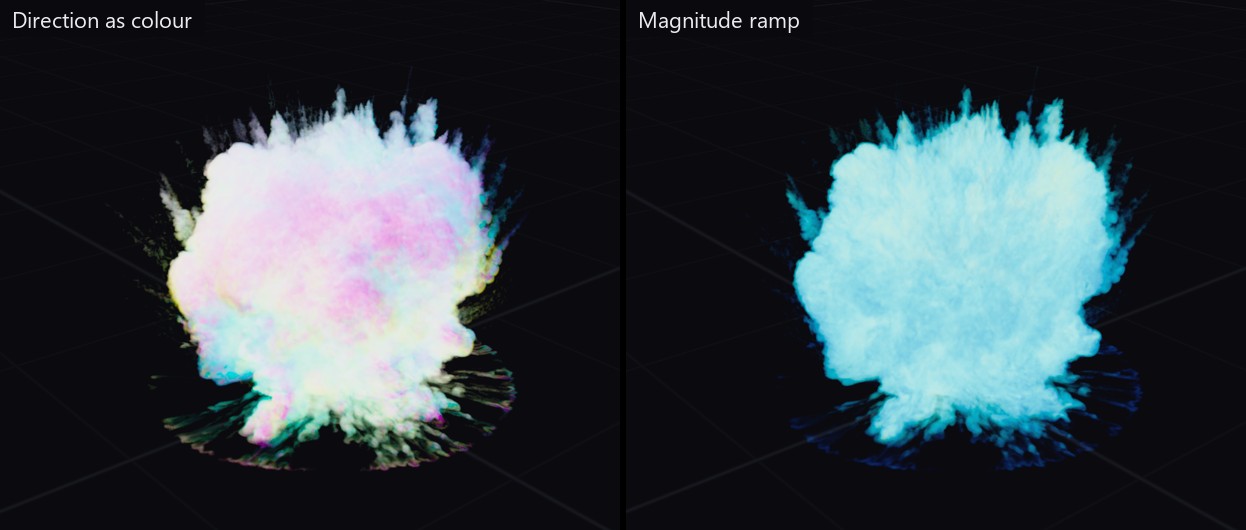
07 - Data Visualization shows the velocity field unlit, which is how you confirm a cache has usable motion. Choose a Velocity Mode (1); Velocity Scale (2) and Velocity Gain (3) adjust the display.
Once the volume looks right, turn it into something a level can use.