The Viewer
Double-click a VDBST or SVT in the Content Browser. The viewer opens with the settings panel on the left and a raymarched preview on the right.
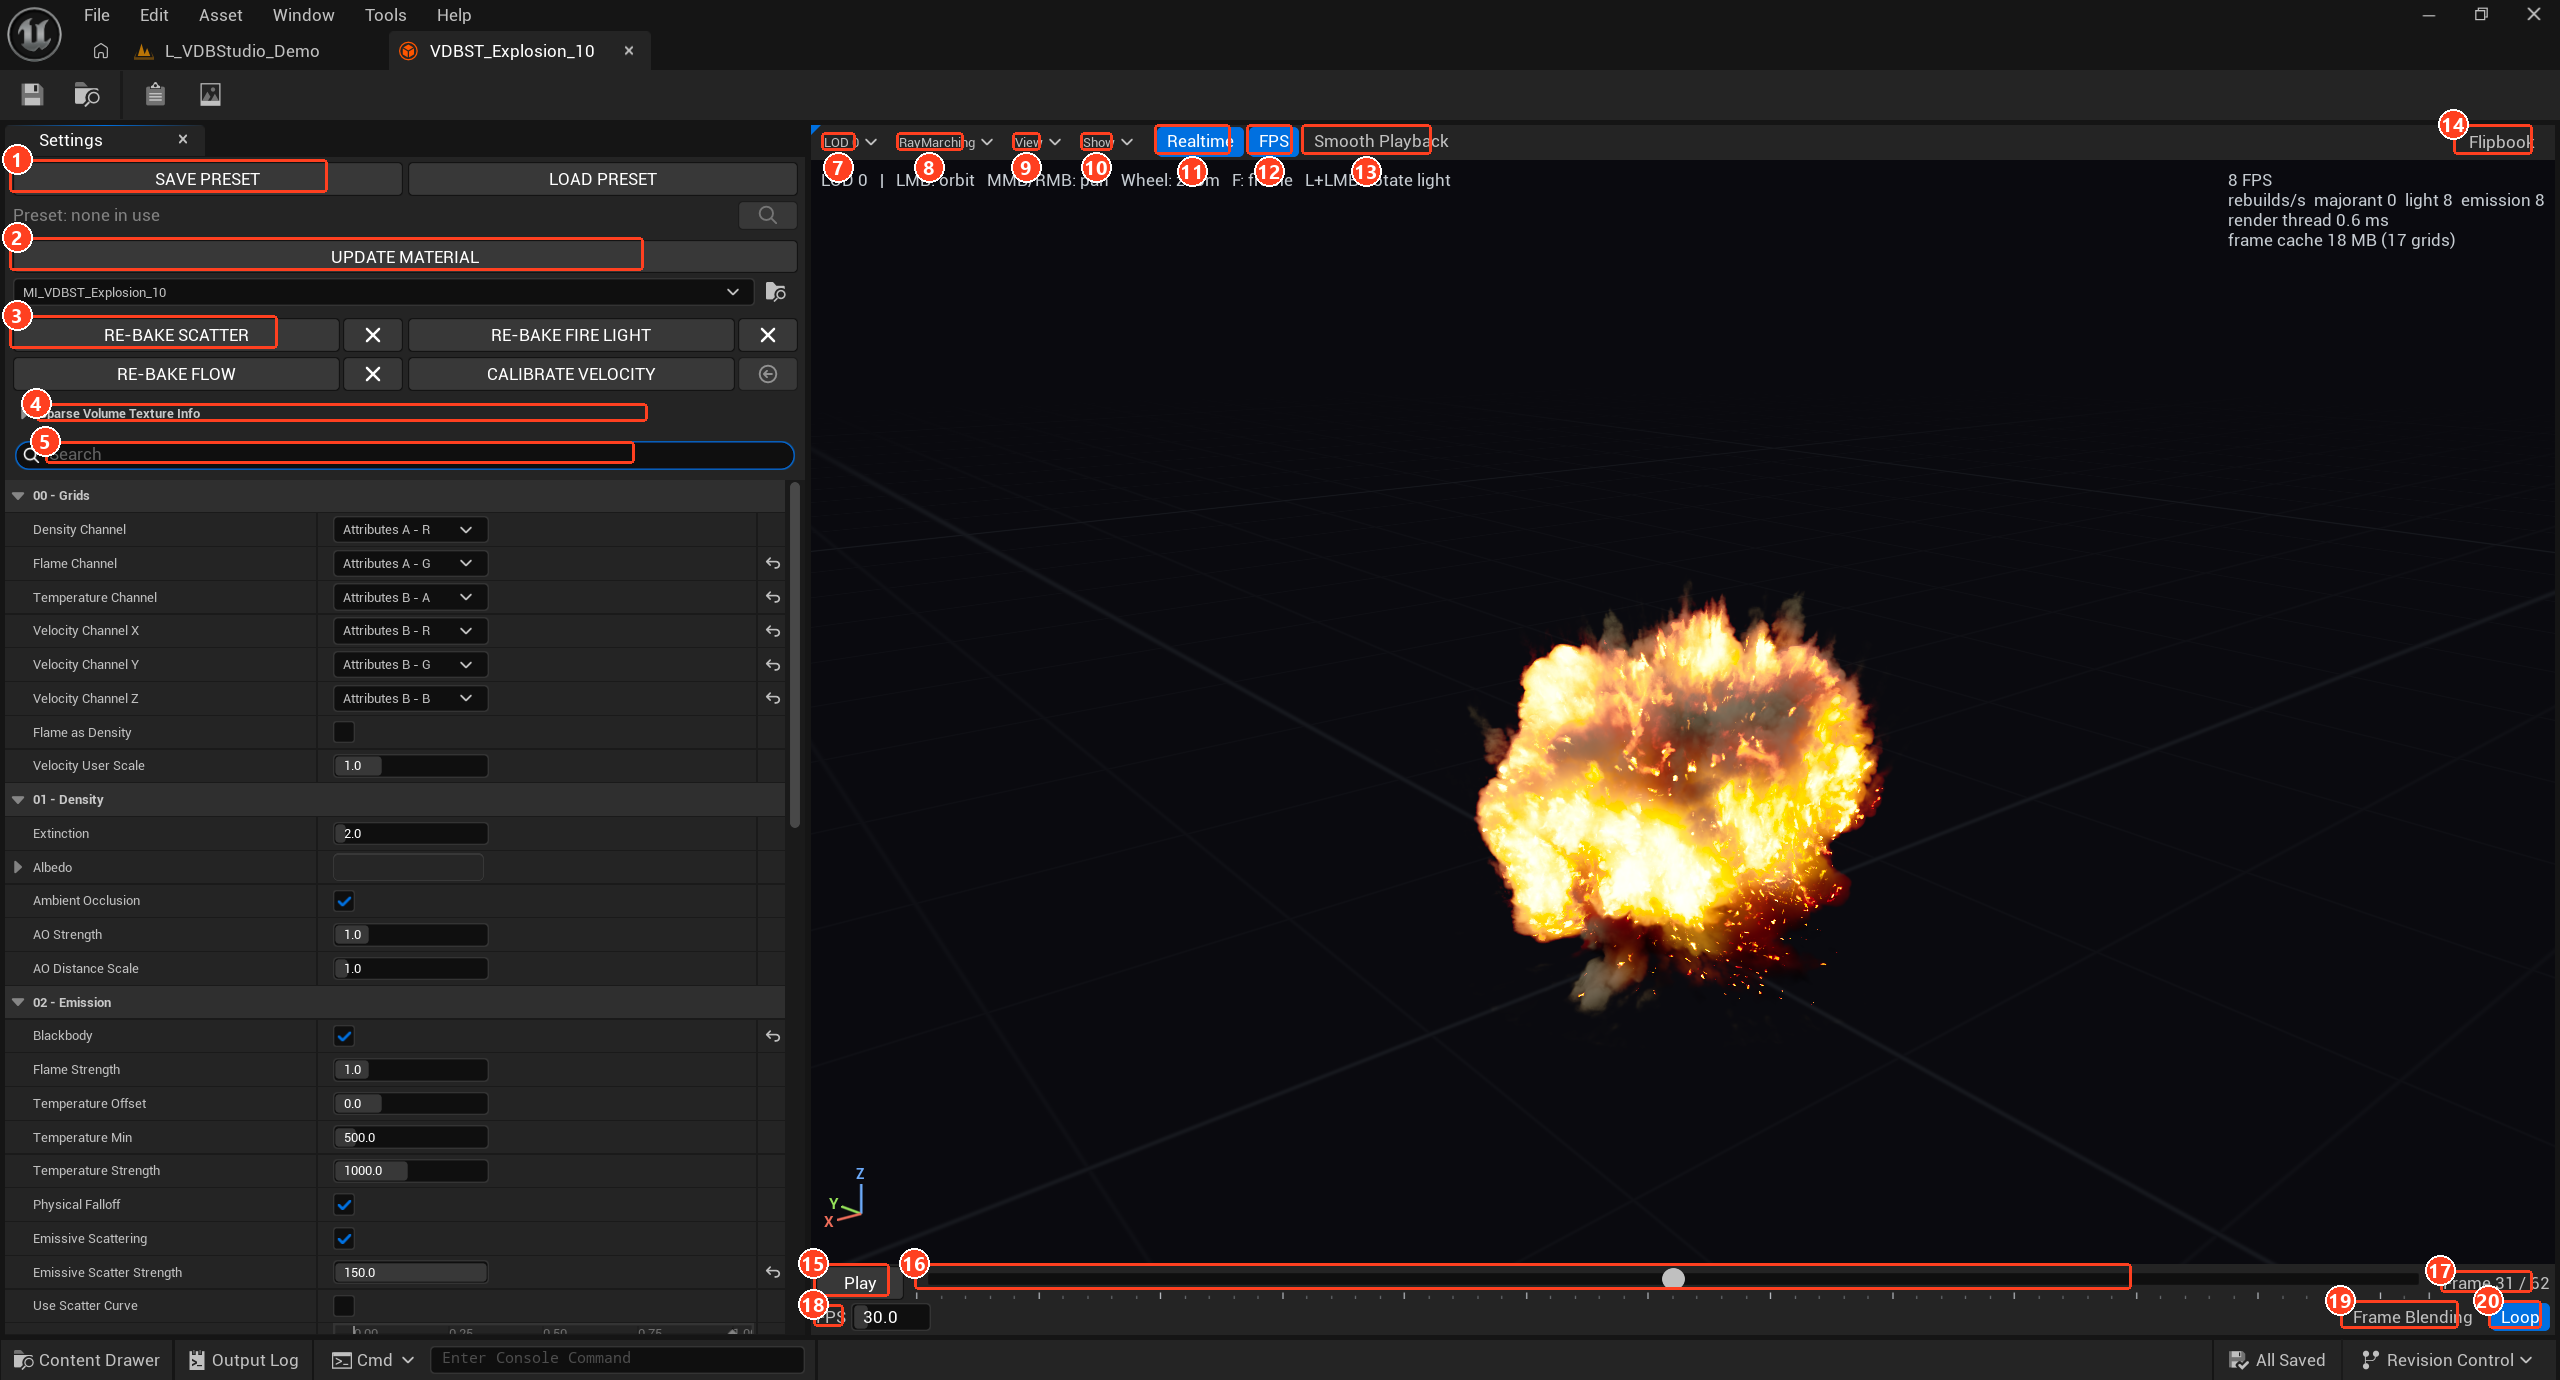
The viewer is a preview renderer with its own look. It renders independently of any level, so you can judge a volume without building a scene. Settings are stored on the asset as you change them; save the asset to keep them.
| # | Control | Purpose |
|---|---|---|
| 1 | SAVE PRESET | Saves the look. LOAD PRESET is beside it. |
| 2 | CREATE / UPDATE MATERIAL | Generates or rebuilds the volume's material. |
| 3 | Bake buttons | Compute data for the level. See Lighting and Shadows. |
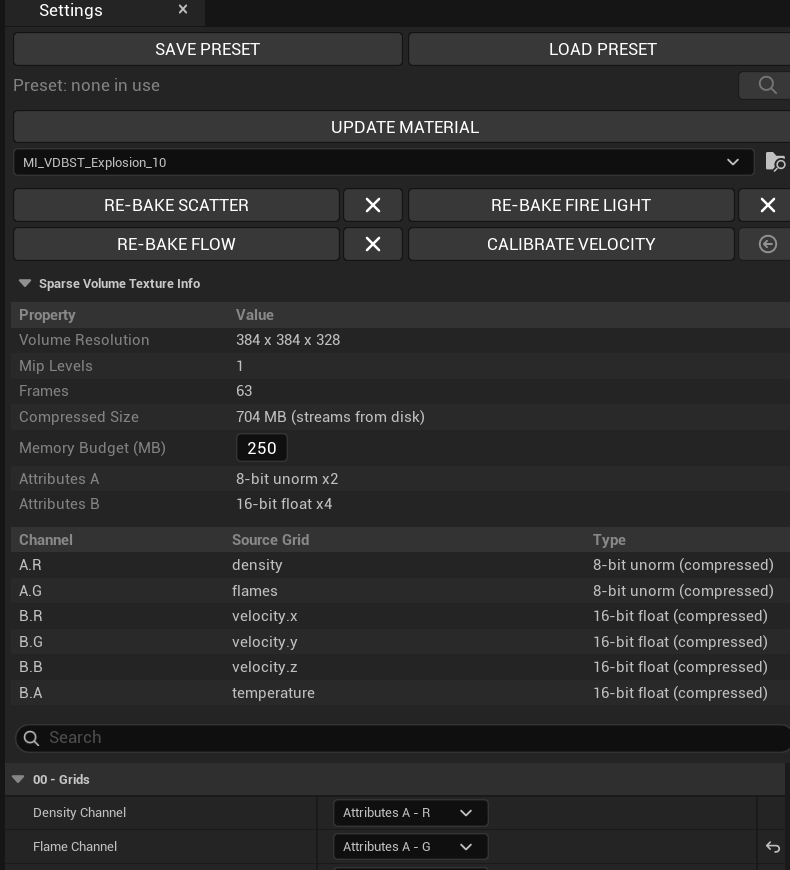
| 4 | Sparse Volume Texture Info | Resolution, memory and channels of the asset. Click it to expand. |
| 5 | Search | Filters the settings by name. |
| 7 | LOD | Resolution level sampled. |
| 8 | RayMarching | Render quality against speed. |
| 9 | View | Exposure, tonemapper, background. |
| 10 | Show | Bounding box, grid, checker, up axis. |
| 11 | Realtime | Runs a clock for animated micro detail. |
| 12 | FPS | Frame rate and render statistics. |
| 13 | Smooth Playback | Streams without waiting (SVT). |
| 14 | Flipbook | Records a flipbook texture. |
| 15 | Play | Starts and pauses the sequence. |
| 16 | Timeline | Scrubs through frames. |
| 17 | Frame counter | Current and last frame. |
| 18 | FPS field | Playback rate. |
| 19 | Frame Blending | Interpolates between frames. |
| 20 | Loop | Repeats the sequence. |
Navigation
| Input | Action |
|---|---|
| Left mouse drag | Orbit |
| Middle or right mouse drag | Pan |
| Mouse wheel | Zoom |
F | Frame the volume |
Hold L + left mouse drag | Rotate the light |
Playback
Press Play (15) or drag the timeline (16). The FPS field (18) sets the playback rate, independent of the rate the sequence was exported at. Frame Blending (19) is covered in Playback and Frame Blending.
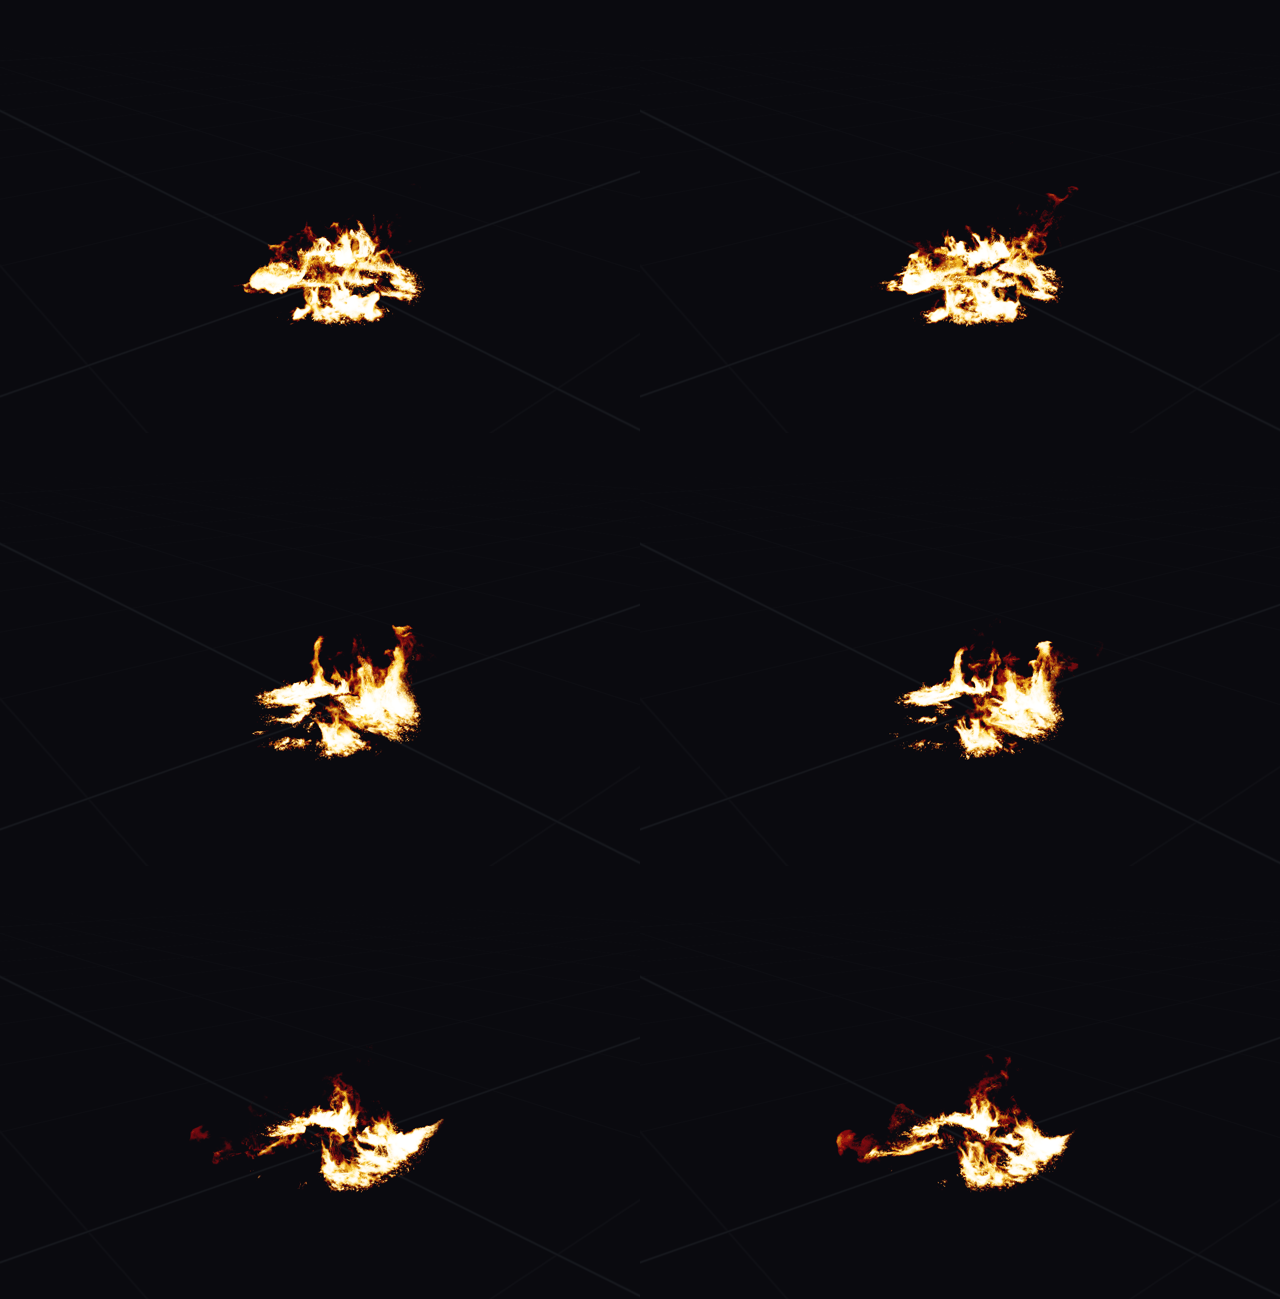
While paused, the image keeps refining until it is clean. Any camera or setting change restarts that refinement.
Toolbar menus
RayMarching (8), View (9) and Show (10) open drop-down panels of settings. The numbers on each panel match the tables in the Viewer Settings reference.
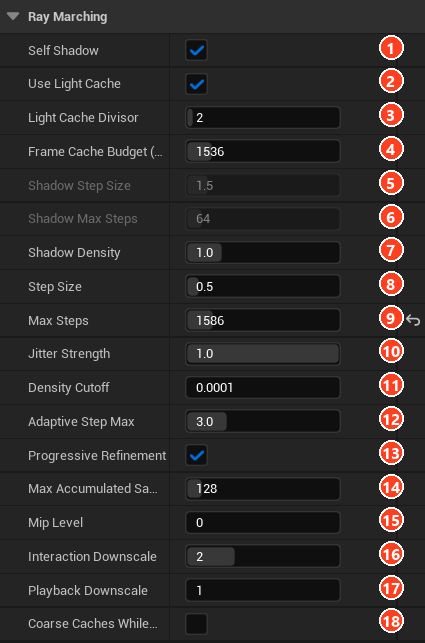
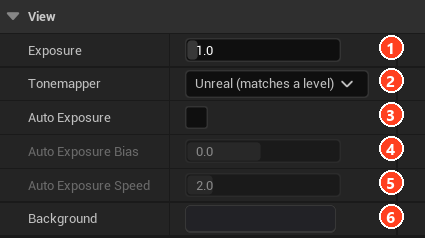
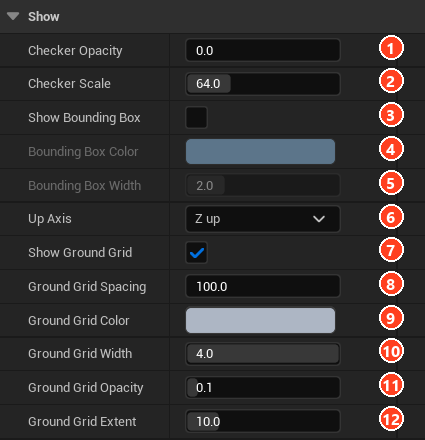
The defaults suit most volumes. Step Size is the first control to raise if the viewer is slow, and Max Accumulated Samples the first to raise if the paused image stays noisy.
Matching a level
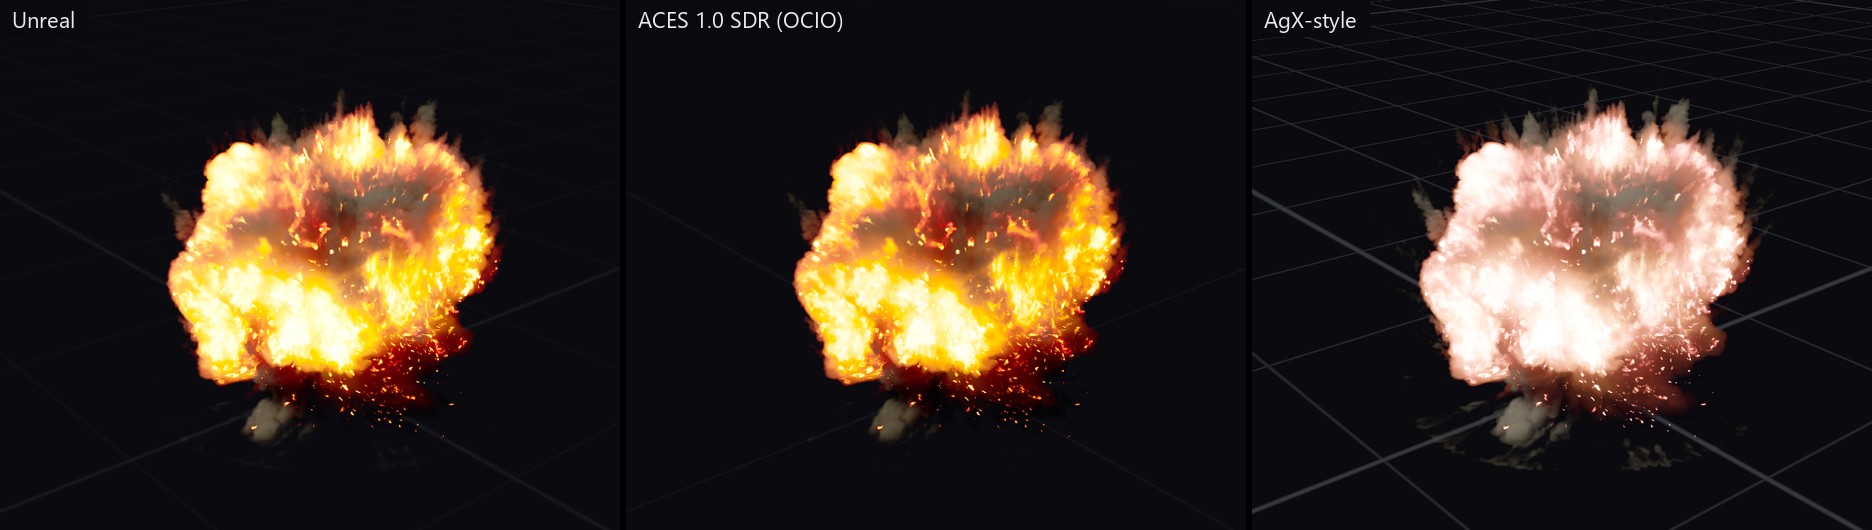
Set View > Tonemapper to Unreal to match a level that uses Manual exposure with Apply Physical Camera Exposure off and Exposure Compensation 0. Exposure 1 corresponds to that level. Use ACES 1.0 SDR (OCIO) to match a level viewed through an OpenColorIO transform.
Settings panel
The buttons at the top save presets, generate materials and run bakes. The categories below hold every look control, numbered in the order you normally work through them. The next page goes through them.